Media Library
The Media Library is where you upload the files your AI agent can send to customers — menus, catalogues, price lists, brochures, short videos. Upload a file once, give it a name and a description, assign it to an agent, and the agent can deliver it straight into any conversation.
For Balloon Bliss, that means Bella can send the balloon catalogue when someone asks "what do you offer?", or the party-package price list when the conversation turns to budget — as real files in the chat, not links the customer has to chase.
The Knowledge Base is what the agent reads — documents that become searchable answers. The Media Library is what the agent sends — files delivered to the customer as-is. A PDF menu belongs in both if you want the agent to answer questions from it and be able to send it.
Where to Find It
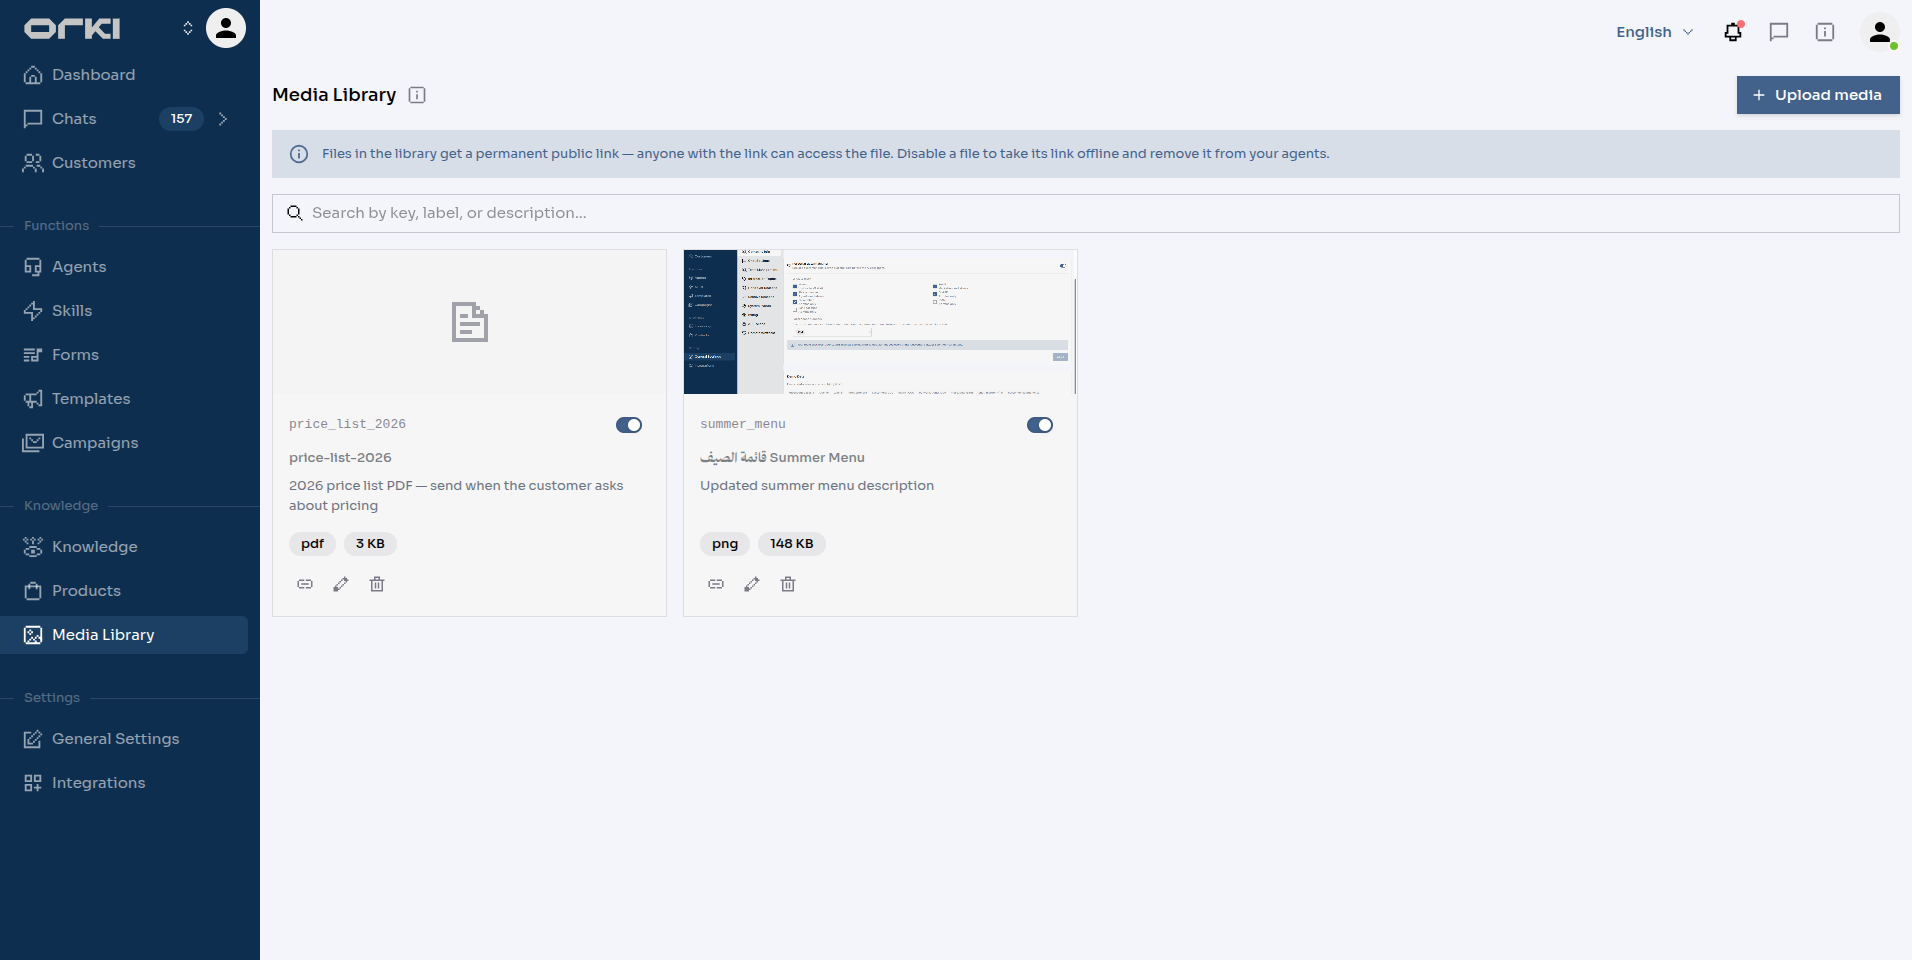
Media Library in the sidebar (under Knowledge). The gallery shows every file with its key, description, format, size, and an on/off switch.
Uploading a File
- Click Upload media
- Choose the file. Accepted formats: JPEG, PNG, WebP, GIF images, MP4 / 3GP video, and PDF — up to 25 MB per file, 100 files per workspace.
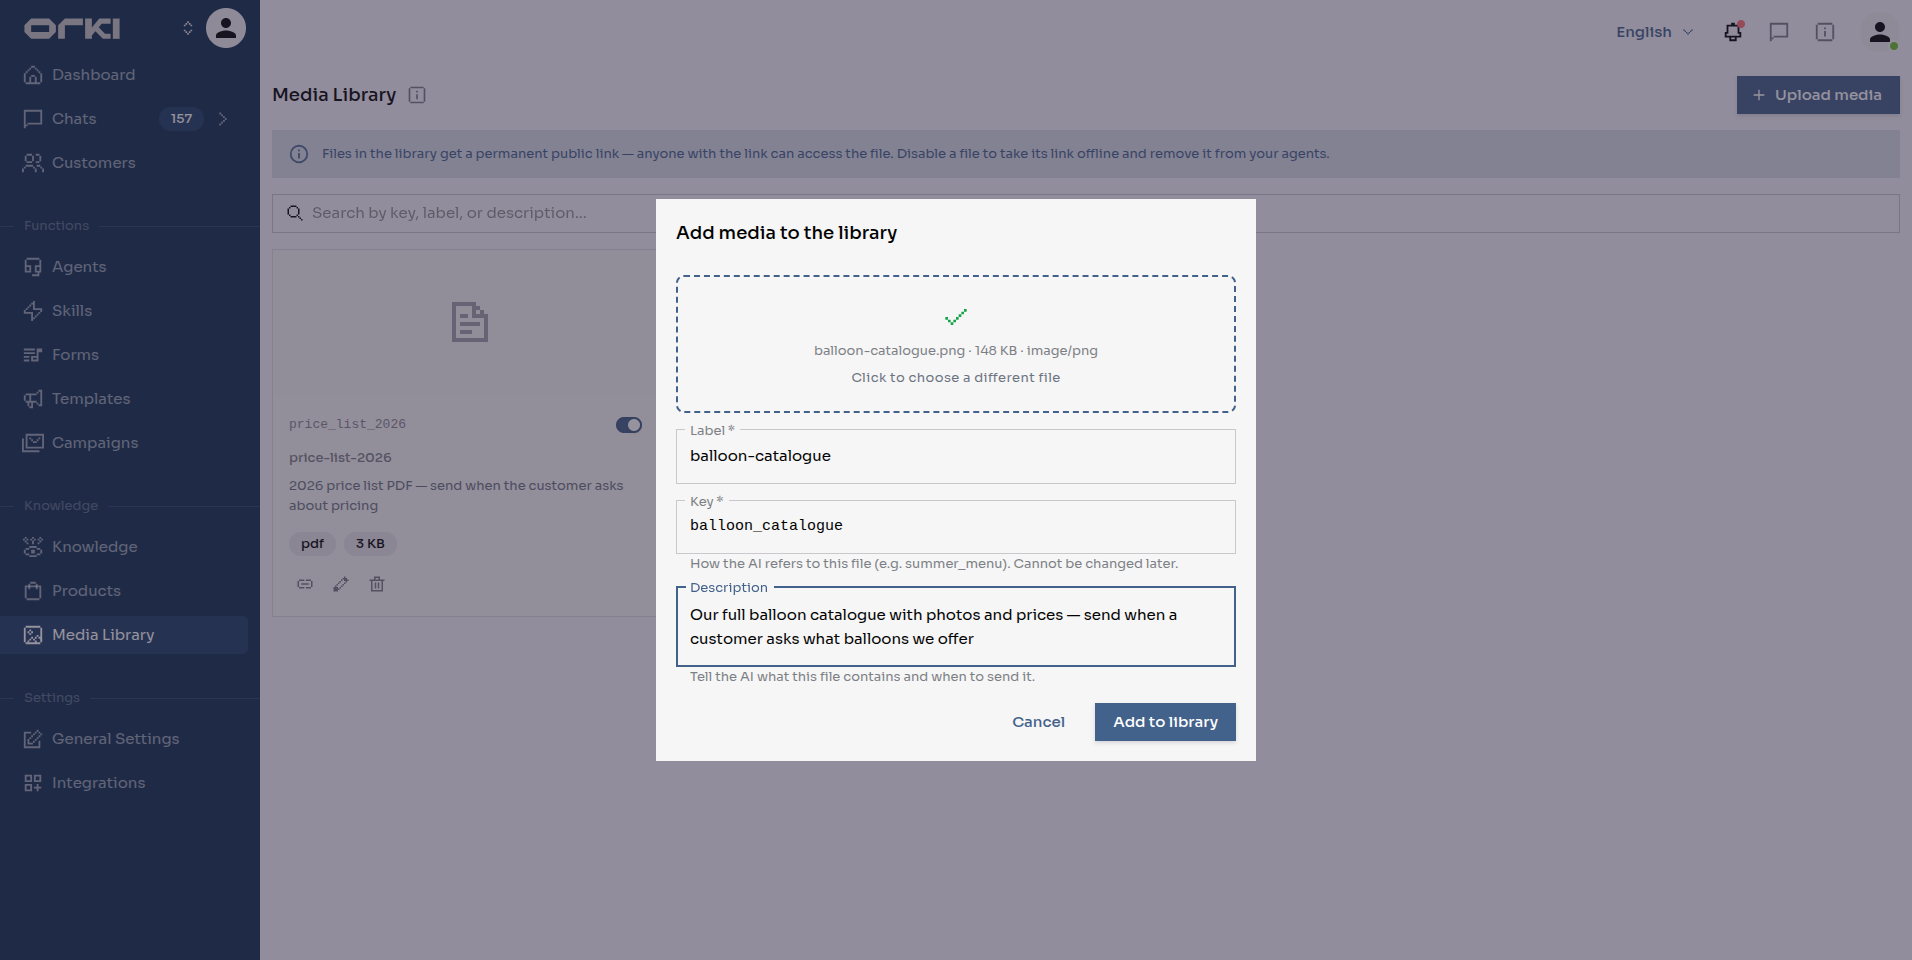
- Fill in the three fields:
| Field | What it means |
|---|---|
| Label | A human-readable name — "Balloon Catalogue 2026". Shown in the gallery and to the agent. |
| Key | A snake_case identifier (balloon_catalogue), suggested from the label. This is how the agent refers to the file — and it cannot change later. |
| Description | What the file contains and when to send it. This is the most important field — it is what the agent decides by. |
- Click Add to library.
The agent never opens your files — it cannot see what's inside an image or a PDF. It chooses what to send purely from the label and description. So write the description as a sending rule:
Our full balloon catalogue with photos and prices — send when a customer asks what balloons we offer.
beats "catalogue file" every time. If the agent ever sends the wrong file, fix the descriptions first.
Assigning Files to Agents
Uploaded files do nothing until assigned. Go to Agents → (your agent) → Media and toggle on the files this agent may send:
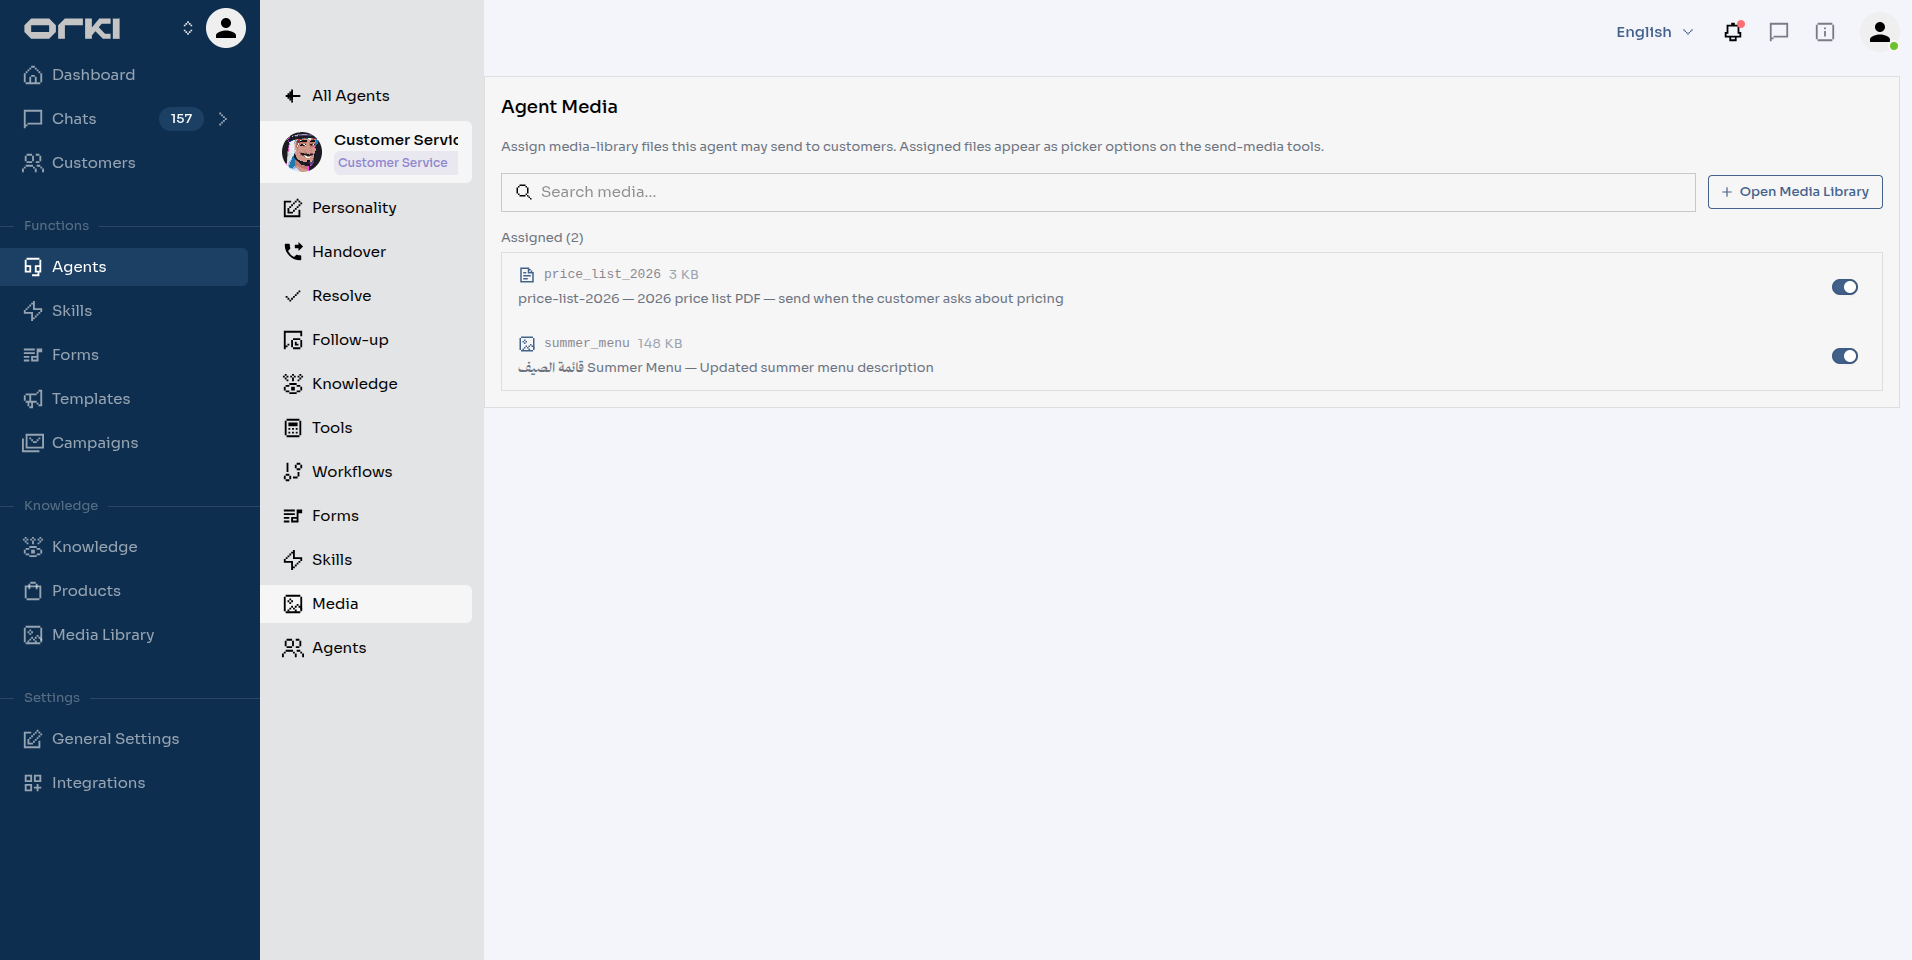
Each agent only sees its own assigned files, and they appear as ready-made options on the agent's send-media tools. Keep the list short and relevant — a focused set makes for better choices.
Changes to the library (new files, edited descriptions, toggles) reach the agent within a few minutes.
What It Looks Like in a Chat
The agent picks the file by its key and Orki delivers the real thing — an image renders inline, a PDF arrives as a document the customer can open:
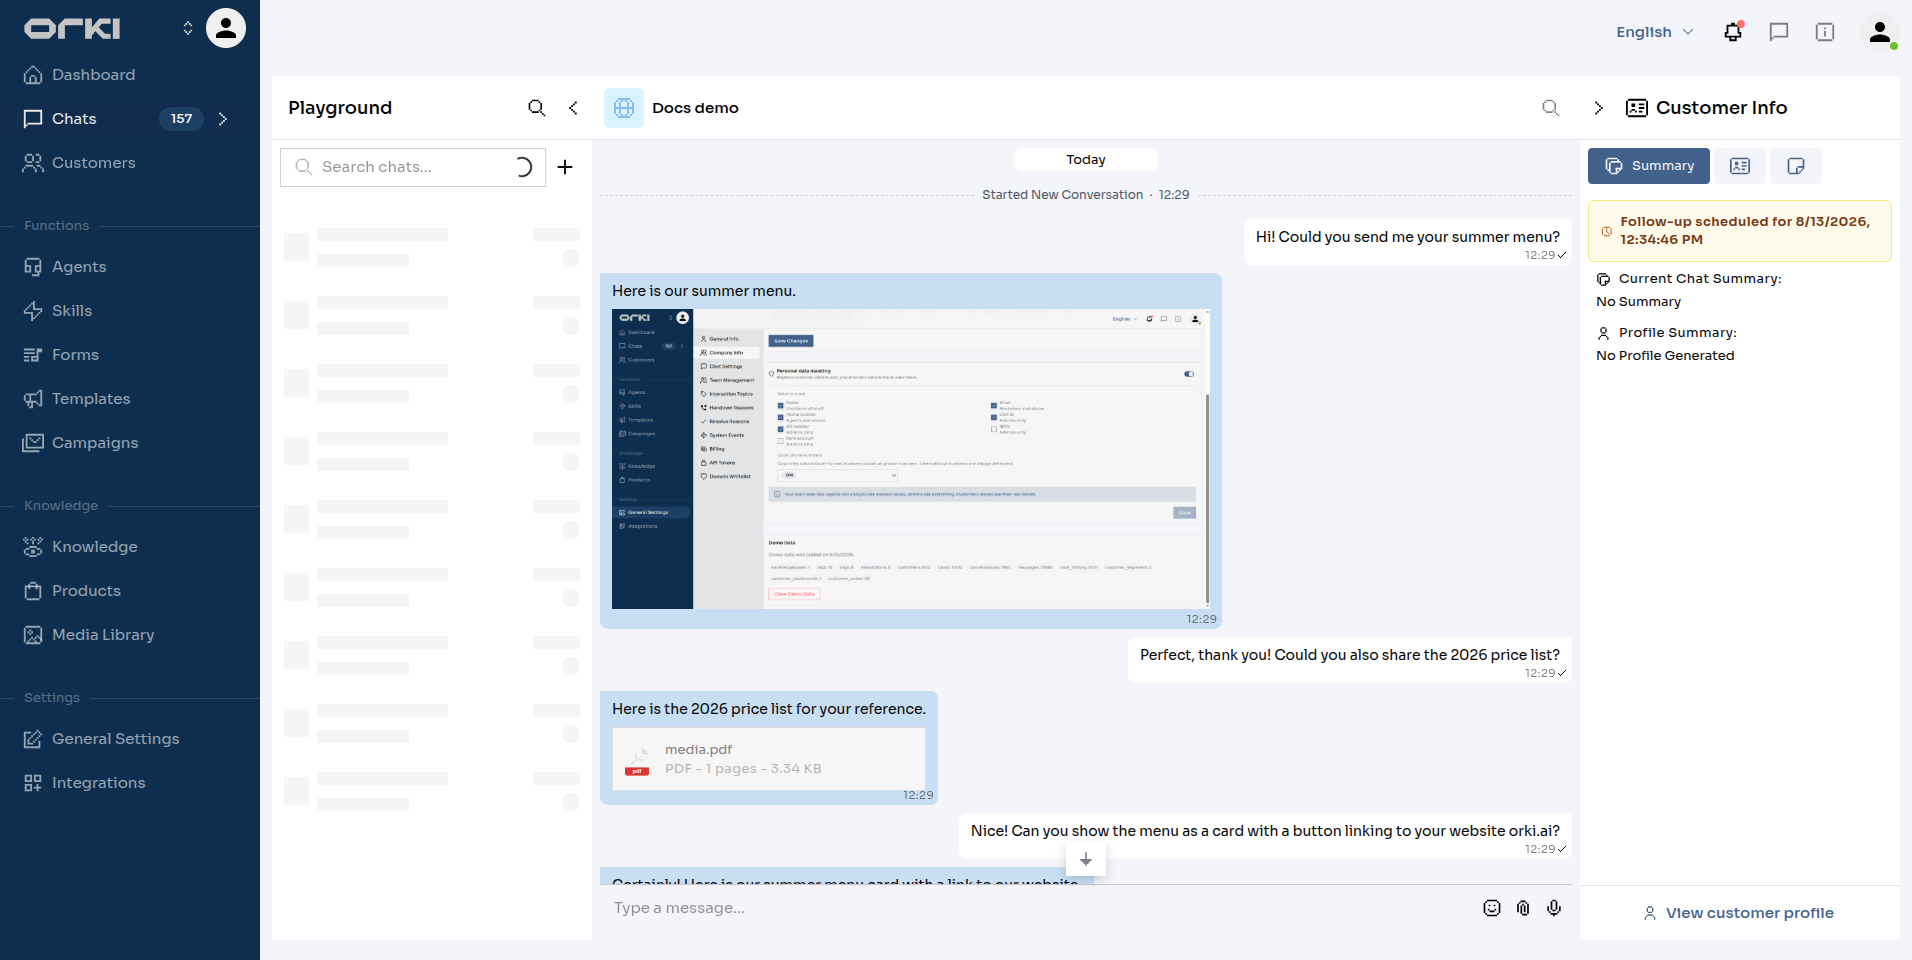
Library images can also appear as carousel cards with a call-to-action button:
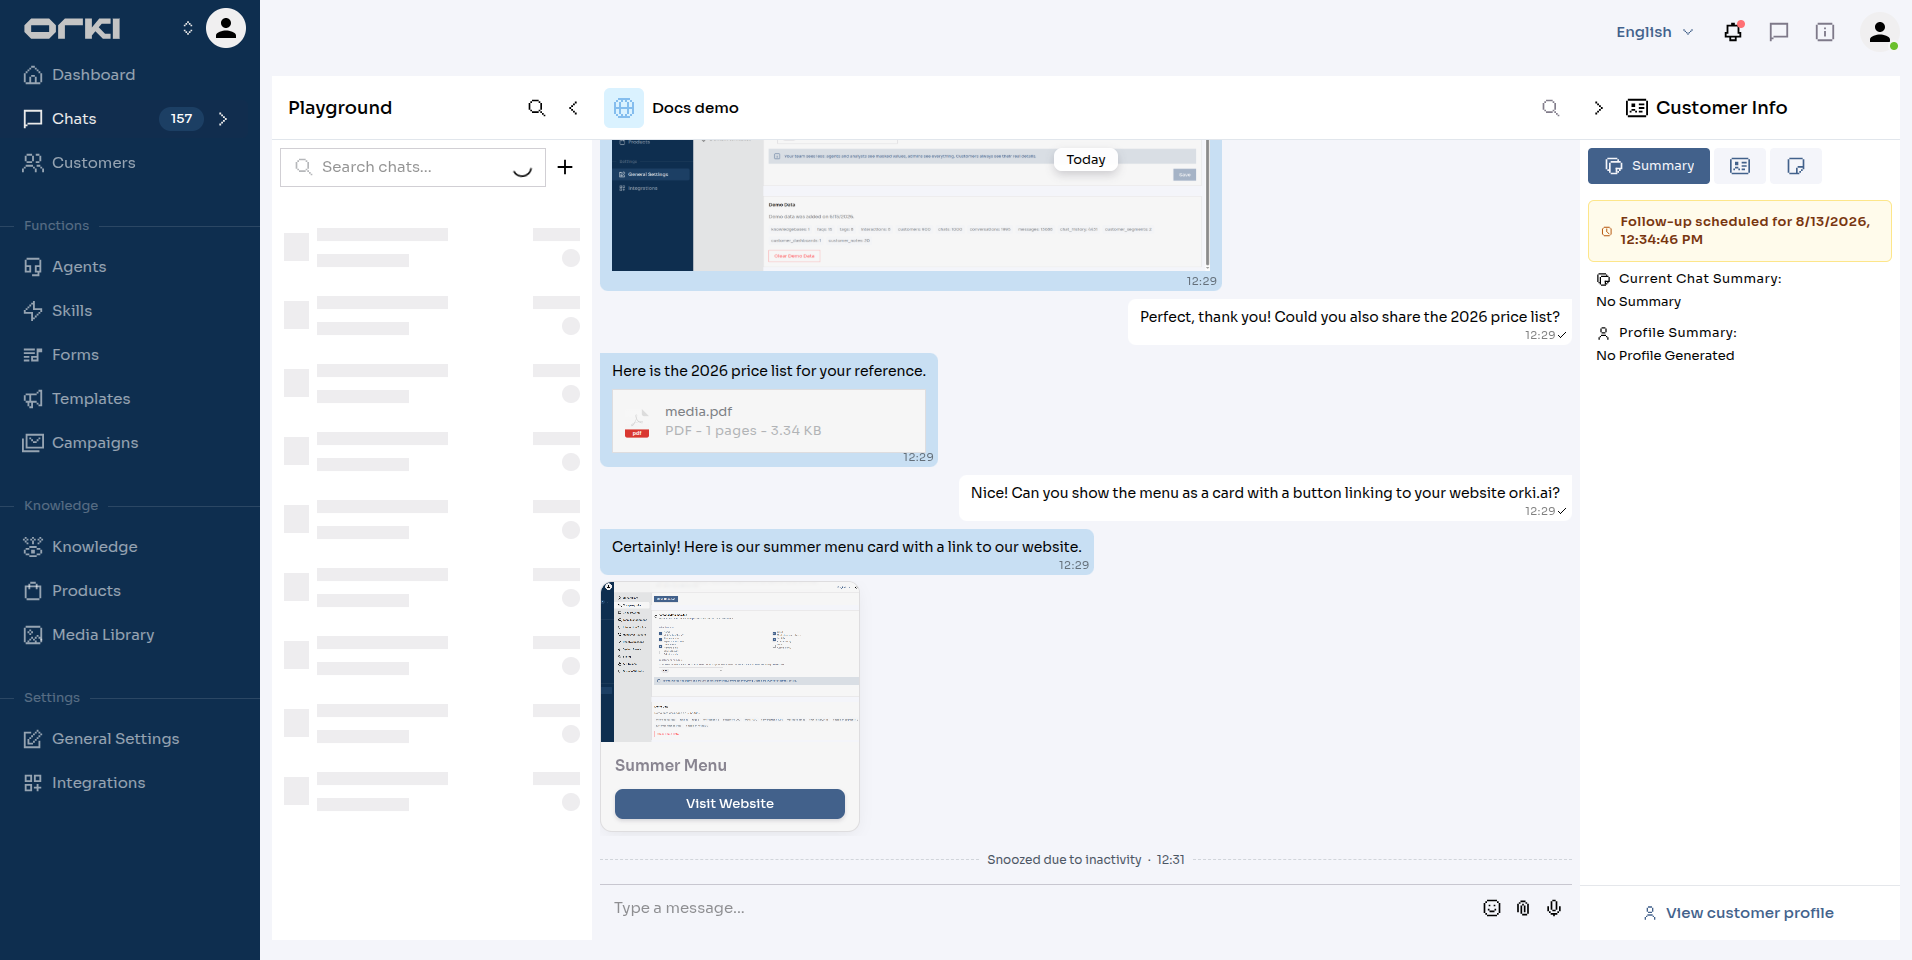
Try it yourself in the agent's playground before going live: ask for the file the way a customer would.
Guiding the Agent from the Prompt
Descriptions teach the agent what each file is. For rules about when — ordering, priorities, restraint — add a few lines to the agent's custom instructions (Agents → (your agent) → Personality), referring to files by their key:
When a customer asks what balloons we offer, send balloon_catalogue
before describing options yourself.
Send party_price_list only when they ask about prices — never unprompted.
If they ask for "the menu of everything", send both, catalogue first.
A few rules that work well:
- Lead with the file. "Send the catalogue, then summarise" reads better than a long text answer followed by an afterthought attachment.
- Gate the sensitive ones. "Send
wholesale_price_listonly after the customer says they are a business buyer." - Don't over-send. Tell the agent one file per topic — customers on WhatsApp experience every file as a separate message.
You don't need to explain how to send a file — the agent's send-media tool already lists its assigned files with their descriptions. The prompt is for when and the rules around it, exactly like tools.
Public Links
Every file gets a permanent public link — the link button on its card copies it. This is what lets the agent deliver files on WhatsApp and Instagram, and you can reuse the same link anywhere: campaign templates, your website, a QR code on the shop counter.
Media Library files are publicly reachable by design. Upload only content you'd happily hand any customer — never confidential documents.
Two switches control a file's life:
| Action | Effect |
|---|---|
| Disable (the card's switch) | The public link stops working immediately and the file disappears from every agent's options. Enable it again to restore both. |
| Delete | Removes the file permanently. To replace a file and keep the same link, delete it and upload the new version with the same key — the key is the link. |
Troubleshooting
| Symptom | Cause | Fix |
|---|---|---|
| The agent never sends the file | Not assigned to that agent, or the file is disabled | Check Agents → (agent) → Media and the card's switch |
| The agent sends the wrong file | Descriptions too similar or too vague | Rewrite each description as a sending rule with a distinct trigger |
| The agent describes the file instead of sending it | No prompt guidance | Add a "send key when…" line to the agent's instructions |
| Changes don't show up immediately | Agent options are cached briefly | Wait a few minutes and try again |
| A file won't upload | Format not accepted or over 25 MB | Convert to JPEG/PNG/WebP/GIF, MP4/3GP, or PDF; compress large files |
| The public link returns nothing | The file is disabled or was deleted | Re-enable it, or re-upload with the same key to revive the link |
| A PDF isn't offered in carousels | Carousel cards are images only | Use an image version for cards; send the PDF with the regular send-media flow |
Next Steps
- Tools — the send-media tools your files appear on
- Agent Personality — where the "when to send what" prompt lines live
- Knowledge Base — content the agent reads, rather than sends
- Skills — reusable know-how documents, the same assign-per-agent pattern